希望可以从零开始,一步一步进行模型的微调。发现第一步,就是需要拿llama 2的原始模型,进行格式的转换,国内外使用HuggingFace模型格式(简称HF格式)和其配套的通用代码进行微调是主流。这里就记录格式转换全过程。
访问HuggingFace,很多模型提供GGML,GGUF格式和GPTQ格式,目前GGML格式已经淘汰,使用GGUF替代,其实这些大模型格式是这样进行转换:
- 原始格式LLama ->转为huggingface(HF)格式
- huggingface格式(HF) ->转为GGUF格式
- huggingface格式(HF) ->转为GPTQ格式
- huggingface格式(HF) ->转为AWQ格式
原始格式LLama转换HF格式,是没有精度的损失,转换成GGUF和GPTQ,你可以设置参数,降低精度,缩小模型。
GGUF,GPTQ,AWQ 我都在colab上实现量化,GPTQ和AWQ对GPU的要求还是很高,需要至少24G的显存。
HF转换
将原始格式的LLaMA模型,也就是你从官方下载回来的代码,转换为Hugging Face Transformers支持的格式
原始模型准备
原始模型,官方下载回来的文件包括:
如果你无法从官网下载Llama-2-7b的模型,可以参考,git clone ,删除多余的文件,我的实验也是使用这个repo来完成。
1
git clone https://www.modelscope.cn/shakechen/Llama-2-7b.git
下载完成后,需要删除没必要的文件
1
2
3
4
cd Llama-2-7b/
rm -rf .git .gitattributes configuration.json gitattributes LICENSE.txt README.md USE_POLICY.md Responsible-Use-Guide.pdf
mkdir 7B
cd ..
下载回来的repo是26G,删除隐藏文件后,变成13G。
conda
1
2
conda create -n shake python=3.11
conda activate shake
安装所需库
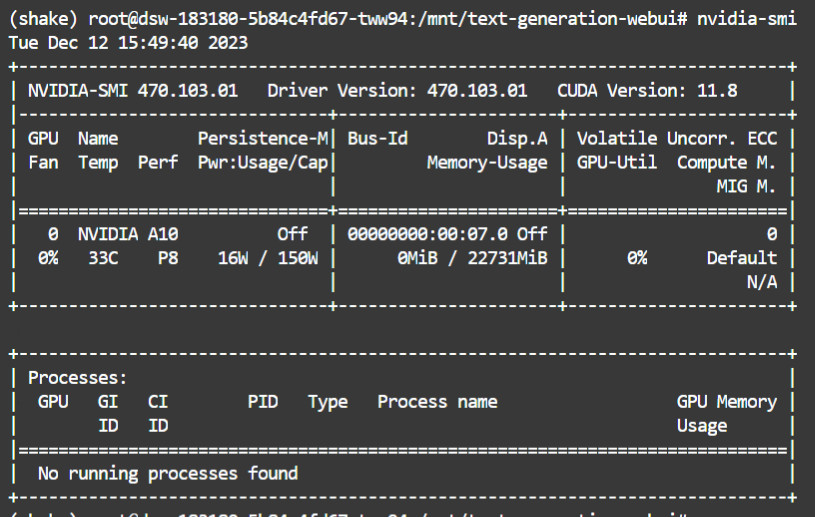
首先确保你已经安装了transformers和torch库。需要确认是否使用GPU,如果是GPU,需要确认显卡支持的Cuda的版本。
GPU
1
nvidia-smi
Cuda的版本为11.8.

1
2
3
pip3 install torch torchvision torchaudio --index-url https://download.pytorch.org/whl/cu118
pip3 show torch
pip3 install transformers
CPU
1
2
pip3 install torch torchvision torchaudio --index-url https://download.pytorch.org/whl/cpu
pip3 install transformers
转换工具
1
git clone https://github.com/huggingface/transformers
安装转换工具的依赖
1
pip install sentencepiece protobuf accelerate
进行转换
运行下面命令,就可以获得HF格式。
1
python3 transformers/src/transformers/models/llama/convert_llama_weights_to_hf.py --input_dir ./Llama-2-7b --model_size 7B --output_dir ./Llama-2-7b-hf

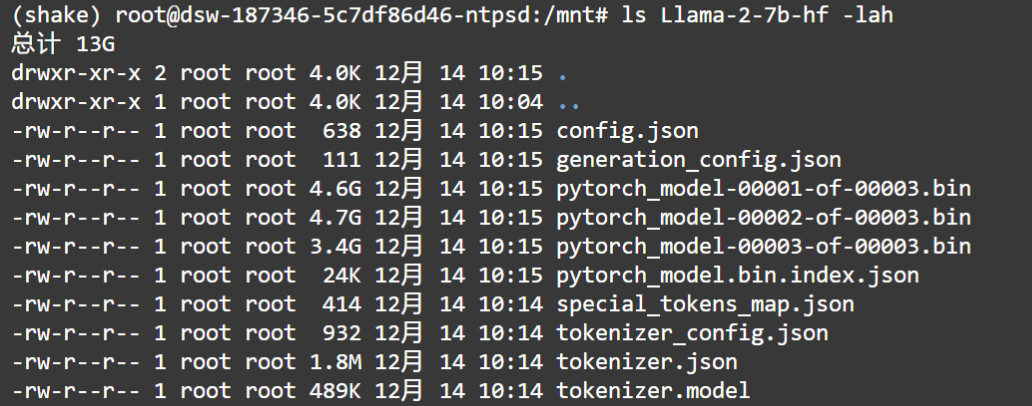
转换结果:

HF to GGUF Quantization
GGUF格式,表示这个模型只支持CPU
1
2
3
git clone https://github.com/ggerganov/llama.cpp.git
pip install -r llama.cpp/requirements.txt
python llama.cpp/convert.py -h
进行转换
1
python llama.cpp/convert.py  Llama-2-7b-hf --outfile llama-2-7b-Q8_0.gguf --outtype q8_0
outtype的选项有: ‘f32’, ‘f16’, ‘q8_0’
1
2
(shake) root@eais-bjrs3yp8aak1upawsmjg-54f5dcbfbc-tvpsm:/mnt# ls llama-2-7b-Q8_0.gguf -lash
6.7G -rw-r--r-- 1 root root 6.7G 12月 14 19:01 llama-2-7b-Q8_0.gguf
How to convert HuggingFace model to GGUF format
HF to GPTQ Quantization
GPTQ格式,就是支持GPU。必须有GPU的虚拟机,装上Cuda,才能进行转换。
1
2
3
4
5
pip3 uninstall -y auto-gptq
pip3 install gekko pandas
git clone https://github.com/PanQiWei/AutoGPTQ
cd AutoGPTQ
pip3 install .
在Llama-2-7b ,Llama-2-7b-hf,同级的目录下,建立目录Llama-2-7b-gptq
下载一个文件quant_autogptq.py
1
!wget https://gist.githubusercontent.com/TheBloke/b47c50a70dd4fe653f64a12928286682/raw/ebcee019d90a178ee2e6a8107fdd7602c8f1192a/quant_autogptq.py
最终你看到的目录
1
2
3
4
5
6
7
8
9
10
11
12
(shake) root@eais-bjrs3yp8aak1upawsmjg-54f5dcbfbc-tvpsm:/mnt# ls -lash
总计 6.7G
4.0K drwxr-xr-x  1 root root 4.0K 12月 14 19:20 .
4.0K drwxr-xr-x  1 root root 4.0K 12月 14 18:43 ..
4.0K drwxr-xr-x 11 root root 4.0K 12月 14 19:14 AutoGPTQ
4.0K drwxr-xr-x  3 root root 4.0K 12月 14 18:48 Llama-2-7b
4.0K drwxr-xr-x  2 root root 4.0K 12月 14 19:14 Llama-2-7b-gptq
4.0K drwxr-xr-x  2 root root 4.0K 12月 14 18:57 Llama-2-7b-hf
6.7G -rw-r--r--  1 root root 6.7G 12月 14 19:01 llama-2-7b-Q8_0.gguf
4.0K drwxr-xr-x 19 root root 4.0K 12月 14 18:44 llama.cpp
 12K -rw-r--r--  1 root root  11K 12月 14 19:20 quant_autogptq.py
4.0K drwxr-xr-x 15 root root 4.0K 12月 14 18:44 transformers
进行转换
1
python3 quant_autogptq.py ./Llama-2-7b-hf ./llama-2-7b-gptq wikitext --bits 4 --group_size 128 --desc_act 0 --damp 0.1 --dtype float16 --seqlen 4096 --num_samples 128 --use_fast
use the wikitext dataset for quantisation,If your model is trained on something more specific, like code, or non-English language, then you may want to change to a different dataset. Doing that would require editing quant_autogptq.py to load an alternative dataset.
对于GPTQ的量化,需要用到dataset,看材料,你使用不同的Dataset的最后量化的效果可能是不一样。
在国内由于无法连接huggingface的Dataset,导致无法转换成功,利用Colab,我已经转换成功。说明过程是没问题的。
How to convert HuggingFace model to GGPTQ format
HF to AWQ Quantization
这是最新的一种Quantization方法,效果最好。
有Quantization详细说明
autoawq
1
!pip install -q  autoawq
量化
1
2
3
4
5
6
7
8
9
10
11
12
13
14
15
16
17
from awq import AutoAWQForCausalLM
from transformers import AutoTokenizer

model_path = 'meta-llama/Llama-2-7b-hf'
quant_path = 'Llama-2-7b-awq'
quant_config = { "zero_point": True, "q_group_size": 128, "w_bit": 4, "version": "GEMM" }

# Load model
model = AutoAWQForCausalLM.from_pretrained(model_path)
tokenizer = AutoTokenizer.from_pretrained(model_path, trust_remote_code=True)

# Quantize
model.quantize(tokenizer, quant_config=quant_config)

# Save quantized model
model.save_quantized(quant_path)
tokenizer.save_pretrained(quant_path)
检查
1
quant_config
compatible with transformers
1
2
3
4
5
6
7
8
9
10
11
12
13
14
15
16
17
18
19
from transformers import AwqConfig, AutoConfig
from huggingface_hub import HfApi

# modify the config file so that it is compatible with transformers integration
quantization_config = AwqConfig(
	bits=quant_config["w_bit"],
	group_size=quant_config["q_group_size"],
	zero_point=quant_config["zero_point"],
	version=quant_config["version"].lower(),
).to_dict()

# the pretrained transformers model is stored in the model attribute + we need to pass a dict
model.model.config.quantization_config = quantization_config
# a second solution would be to use Autoconfig and push to hub (what we do at llm-awq)


# save model weights
model.save_quantized(quant_path)
tokenizer.save_pretrained(quant_path)
上传模型到huggingface
1
2
3
4
5
6
api = HfApi()
api.upload_folder(
	folder_path="Llama-2-7b-awq",
	repo_id="chenshake/Llama-2-7b-awq",
	repo_type="model",
)